Showing posts with label chocolate chip cookies. Show all posts

Tuesday, April 5, 2011

Stop the Search….I found it.

I have always talked about the search for the best Chocolate Chip Cookie recipe.  And I have no idea why I haven’t tried this recipe sooner.  I have heard about it often from friends.

Cook’s Illustrated did some serious work testing for this recipe.  And I think they NAILED it.  They are just what they claim. “A chocolate chip cookie that’s moist and chewy on the inside and crisp at the edges, with deep notes of toffee and butterscotch”  These cookies TOTALLY live up to the hype.

aprilcookies 016

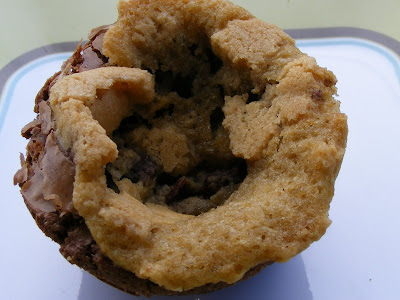
Cook’s Illustrated is kind enough to have their recipe on their website without having to be a member to their site.  (Thank you very much!)  Also instead of chocolate chips, I used Trader Joe’s Mini Peanut Butter Cups….couldn’t resist.  I put them in the freezer for a bit so that they wouldn’t entirely melt while the cookies baked. FYI.

Perfect Chocolate Chip Cookies (Source: Cook’s Illustrated)

Ingredients
  • 1 3/4cups unbleached all-purpose flour (8 3/4 ounces)
  • 1/2teaspoon baking soda
  • 14tablespoons unsalted butter (1 3/4 sticks)
  • 1/2cup granulated sugar (3 1/2 ounces)
  • 3/4cups packed dark brown sugar (5 1/4 ounces) (see note)
  • 1teaspoon table salt
  • 2teaspoons vanilla extract
  • 1large egg
  • 1 large egg yolk
  • 1 1/4cups semisweet chocolate chips or chunks (see note)
  • 3/4cup chopped pecans or walnuts, toasted (optional)
Instructions
  1. 1. Adjust oven rack to middle position and heat oven to 375 degrees. Line 2 large (18- by 12-inch) baking sheets with parchment paper. Whisk flour and baking soda together in medium bowl; set aside.

  2. 2. Heat 10 tablespoons butter in 10-inch skillet over medium-high heat until melted, about 2 minutes. Continue cooking, swirling pan constantly until butter is dark golden brown and has nutty aroma, 1 to 3 minutes. Remove skillet from heat and, using heatproof spatula, transfer browned butter to large heatproof bowl. Stir remaining 4 tablespoons butter into hot butter until completely melted.

  3. 3. Add both sugars, salt, and vanilla to bowl with butter and whisk until fully incorporated. Add egg and yolk and whisk until mixture is smooth with no sugar lumps remaining, about 30 seconds. Let mixture stand 3 minutes, then whisk for 30 seconds. Repeat process of resting and whisking 2 more times until mixture is thick, smooth, and shiny. Using rubber spatula or wooden spoon, stir in flour mixture until just combined, about 1 minute. Stir in chocolate chips and nuts (if using), giving dough final stir to ensure no flour pockets remain.

  4. 4. Divide dough into 16 portions, each about 3 tablespoons (or use #24 cookie scoop). Arrange 2 inches apart on prepared baking sheets, 8 dough balls per sheet. (Smaller baking sheets can be used, but will require 3 batches.)

  5. 5. Bake cookies 1 tray at a time until cookies are golden brown and still puffy, and edges have begun to set but centers are still soft, 10 to 14 minutes, rotating baking sheet halfway through baking. Transfer baking sheet to wire rack; cool cookies completely before serving.

I had to take a picture of the perfect scoop before I baked them!

aprilcookies 014

I also think that this is a great cookie base and look forward to trying it with chocolate chips, butterscotch chips and any other goodies I can think of.

Friday, July 24, 2009

Fixation Friday

I use to think my life would be a constant search for the perfect chocolate chip cookie recipe...but I think I may have found it, tweaked it, and perfected it. I am not quite ready to share the recipe with you all just yet...you are going to have to wait for it. I want to make them a couple more times before I decide if the recipe is perfect to my specs for the perfect chocolate chip cookie....nice and crispy buttery edges, a slight chewy center....and just the right amount of chocolate chips. I can't decide if I prefer them with semi-sweet or milk chocolate...I am SO torn on that dilemma .

Here is a pic of what I might think are the perfect chocolate chip cookies.

Tell me...what makes a perfect chocolate chip cookie for YOU? Chewy? Crispy? Buttery? Semi-Sweet? Bitter? Milk? White?

Hope you all had a great week....Happy Fixation Friday!

Take Care,
Tania
Love Big, Bake Often

Friday, July 10, 2009

Fixation Friday is back!

It has been a very long time since I have posted a Fixation Friday post....sorry chocolate lovers! But it is back. Tonight I am featuring an all time fave of mine....Chocolate Chip Cookies. I am always on the search for a great chocolate chip cookie, isn't everyone? So awhile back I had seen How to Eat a Cupcake make Martha Stewart's Chocolate Chip Cookies....and so I decided (after much deliberation) to give them a try...
Look at that dough.....isn't it gorgeous...


I was shocked and dismayed when I started to add the flour and didn't have enough all purpose flour for the recipe! How does a baker run out of flour? By baking too much! So I had bread flour and self rising flour....decisions, decisions... I went with self rising. Not a good choice to get a good feel for these cookies. Instead of crisping up and being chewy like the recipe said they would...they puffed up a little. But I will say this...the flavour is great! They are great cookies. I will definitely make these again with only all purpose flour so I can get the chewiness that I love!

Here is the recipe. Thank you Martha Stewart for a darn good Chocolate Chip Cookie recipe, I love it!
MAKES ABOUT 3 DOZEN
2 1/4 cups all-purpose flour
1/2 teaspoon baking soda
1 cup (2 sticks) unsalted but­ter, room temperature
1/2 cup granulated sugar
1 cup packed light brown sugar
1 teaspoon coarse salt
2 teaspoons pure vanilla extract
2 large eggs
2 cups semisweet or milk chocolate chips, or a combi­nation (about 12 ounces)
1. Preheat oven to 350°F. Whisk together flour and baking soda in a bowl. Put butter and sugars in the bowl of an electric mixer fitted with the paddle attachment. Mix on medium speed until pale and fluffy, about 2 minutes. Reduce speed to low. Add salt, vanilla, and eggs; mix until well blended, about 1 minute. Mix in flour mix­ture. Stir in chocolate chips.
2. Drop heaping tablespoons of dough onto baking sheets lined with parchment paper, spacing 2 inches apart. Bake cookies, ro­tating sheets halfway through until edges turn golden but centers are still soft, 10 to 12 minutes (14-16 for refrigerated cookies). Let cool on sheets on wire racks for 2 minutes. Transfer cookies to wire racks; let cool completely. Cookies can be stored between layers ­of parchment in airtight containers at room temperature up to 1 week.­
I waited too late in the day to get a great shot of the cookies before the sun went down. But I will take some tomorrow and share it with you all.
Make these...you wont be disappointed - and I can say that even though I used the wrong kind of flour! HA!
Take Care,
Tania
Love Big, Bake Often

Tuesday, May 26, 2009

A TWD failure!

I was very excited about this weeks recipe. Very excited. Chipster Topped Brownies - Chocolate Chip Cookie topped Brownies! I am thinking now (in hindsight, which is always 20/20) that I should have just followed the recipe as written and not try to "fun it up!" I thought that making them in a muffin tin and making individual portions for Jason to take to work would be a great way to make these! But alas....there were no great treats to be taken to work. I made one failing tin full, and then scrapped the chocolate chip topper and made mini brownies for the guys.

I was happy to see them baking up fine, they rose nicely and the cookie top browned nicely too, and then failure ensued...as soon as they started to cool they caved in like a fallen souffle! Ugly is a hard word to use when describing baked goods....but these are ugly!

I give you my failed attempt at Chipster Topped Brownies...


There are many TWD bakers out there who followed the recipe and did not have this kind of failure...be sure to check them out. You can find the list of them
here.
I would probably make these again as the concept is great, but next time I will follow the recipe as it is written!!
Note: even though these look ugly - they taste great!
Take Care,
Tania
Love Big, Bake Often